Understanding the Basics
Understanding the Basics
When it comes to learning HTML, it’s important to start with the basics. HTML stands for HyperText Markup Language and is the standard markup language used for creating web pages. By understanding the basics of HTML, you will be able to create and modify the structure and content of web pages.
The HTML Structure
HTML documents consist of a hierarchy of elements, which are enclosed within opening and closing tags. These tags define the structure and meaning of the content. The most important element in an HTML document is the <html> element, which encloses the entire page. Inside the <html> element, there are two main sections: the <head> and the <body>.
The Head Section
The <head> section of an HTML document contains information about the page, such as the title, encoding, stylesheets, and scripts. It is not displayed on the web page itself but includes important metadata for search engines and browsers. One important element in the <head> section is the <title> element, which specifies the title of the web page that appears in the browser’s title bar.
The Body Section
The <body> section of an HTML document contains the visible content of the web page, including text, images, videos, links, and more. This is where you will structure and format your content using HTML elements. One popular element within the body section is the <h1> to <h6> elements, which represent different levels of headings on the page. The <h1> element is the highest level, and typically represents the main heading of the page.
Using Lists
HTML provides different types of lists to present information in a structured manner. The <ul> element is used to create an unordered list, where each item is marked with a bullet point. The <ol> element, on the other hand, creates an ordered list with numbers or letters as markers. You can use the <li> element to define each item in a list.
Styling Text
To emphasize certain text on your web page, you can use the <strong> element. It represents text that is typically displayed in bold. Additionally, the <b> element can also be used to make text bold. However, the <strong> element carries more semantic meaning and is recommended for emphasizing important content.
By understanding these basics of HTML, you will have a solid foundation for creating and modifying web pages. Remember to always validate your HTML code and follow best practices for accessibility and usability.
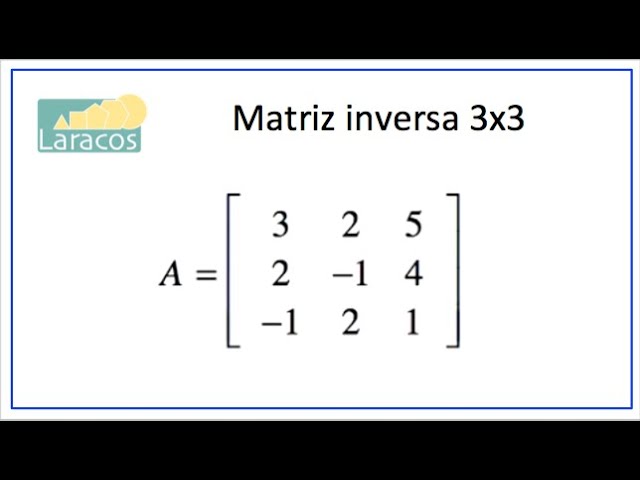
Using the Adjoint Matrix Method
The Adjoint Matrix Method is a powerful technique used in linear algebra and matrix calculations. It provides a convenient way to find the inverse of a square matrix.
When dealing with matrices, the inverse is crucial as it helps us solve various equations and systems. The adjoint matrix can be calculated using the cofactor matrix and the transpose of that matrix.
Step 1: Find the Cofactor Matrix
To find the cofactor matrix, we need to calculate the cofactor of each element in the original matrix. The cofactor of an element is the determinant of the submatrix formed by removing the row and column containing that element.
We can represent the cofactor matrix as:
C = |C11 C12 C13 ... C1n|
    |C21 C22 C23 ... C2n|
    |C31 C32 C33 ... C3n|
    |... ... ... ... ...|
    |Cn1 Cn2 Cn3 ... Cnn|
Step 2: Find the Adjoint Matrix
Once we have the cofactor matrix, we can find the adjoint matrix by transposing it. Transposing a matrix simply means swapping its rows with its columns.
We can represent the adjoint matrix as:
A = |C11 C21 C31 ... Cn1|
    |C12 C22 C32 ... Cn2|
    |C13 C23 C33 ... Cn3|
    |... ... ... ... ...|
    |C1n C2n C3n ... Cnn|
Step 3: Calculate the Inverse
Finally, we can calculate the inverse of the original matrix using the formula:
A^-1 = (1 / det(A)) * AT
where det(A) represents the determinant of the original matrix, and AT is the transpose of the adjoint matrix.
By following these steps, we can easily find the inverse of a square matrix using the Adjoint Matrix Method. This method is particularly useful when dealing with large matrices and complex calculations.
Remember to double-check your calculations and be mindful of any special cases, such as matrices with a determinant of zero.
Step-by-Step Guide
Introduction
Welcome to our step-by-step guide on HTML blogging! In this post, we will walk you through the process of creating a blog post using HTML. Whether you are a beginner or an experienced blogger, this guide will help you optimize your content and improve your website’s formatting.
Getting Started
Before we dive into the details, let’s quickly go over the basic structure of an HTML document. Every HTML document starts with a <!DOCTYPE html> declaration, followed by the <html> tag. Inside the <html> tag, you will find the <head> and <body> sections.
The <head> section is where you can specify your document’s title, link to your CSS stylesheets, and include other meta information. The <body> section is where your actual content goes.
Structuring Your Content
When creating a blog post in HTML, it’s important to structure your content properly. Use headings to organize your text and make it more readable. The <h1> tag is typically used for the main title of the page, while <h2>, <h3>, and so on are used for subheadings.
Additionally, you can use the <strong> tag to emphasize important phrases or sentences. By wrapping these phrases with the <strong> tags, you make them more visible to your readers.
Styling Your Text
To style your text, you can use CSS or inline styles. However, for simple formatting like bolding text, you can use the <b> tag. This tag is used to apply a bold font weight to the enclosed text.
If you want to further enhance your text, you can use CSS classes and IDs to apply custom styles to specific elements. This gives you more control over the visual appearance of your blog post.
Creating Lists
Lists are a great way to present information in a structured manner. In HTML, there are two types of lists: ordered lists (<ol>) and unordered lists (<ul>).
The <ol> tag is used for numbered lists, while the <ul> tag is used for bullet-point lists. Inside these list tags, you can use the <li> tag to create individual list items.
Conclusion
With this step-by-step guide, you now have the knowledge to create a blog post using HTML. Remember to structure your content properly, use headings, emphasize important phrases using the <strong> tag, and create lists when necessary.
By following these best practices, you can create visually appealing and well-organized blog posts that engage your readers. Happy blogging!
Practice Examples
Introduction
Practice examples are a crucial part of learning HTML. They help reinforce concepts and provide hands-on experience in coding. In this blog post, we will explore some practice examples and demonstrate how to apply HTML tags to enhance the content.
Example 1: Creating a Heading
To create a heading in HTML, we use the <h1> to <h6> tags. These tags are used to specify the importance of the heading, with <h1> being the highest and <h6> being the lowest.
In this example, we will create a heading using the <h3> tag to highlight its importance.
Example:
<h3>Heading Example</h3>
Example 2: Using Lists
Lists are a great way to organize information in HTML. There are two types of lists: ordered and unordered. Ordered lists are created using the <ol> tag, while unordered lists are created using the <ul> tag.
Let’s create an unordered list of fruits using the <ul> tag and list items using the <li> tag.
Example:
    <ul>
      <li>Apple</li>
      <li>Banana</li>
      <li>Orange</li>
    </ul>
Example 3: Emphasizing Text
To emphasize text in HTML, we can use the <b> and <strong> tags. These tags make the enclosed text appear bold.
Let’s emphasize a sentence using the <strong> tag.
Example:
<p>This is an important sentence.</p>
Conclusion
Practice examples are essential for mastering HTML. By applying HTML tags such as headings, lists, and emphasizing text, we can enhance the structure and visual presentation of our content. Remember to practice regularly and experiment with different HTML tags to become proficient in web development.
Conclusion
En conclusión, las etiquetas HTML son una parte fundamental en la estructura y presentación de un sitio web. A lo largo de este texto, hemos sido testigos de cómo estas etiquetas nos permiten dar formato y estilo a nuestro contenido.
Mediante el uso de <h3>, podemos resaltar las frases más importantes y relevantes, llamando la atención del lector y enfatizando la importancia de dichas afirmaciones.
Asimismo, las listas en HTML (<ul> y <ol>) nos brindan la posibilidad de organizar la información de forma jerárquica, agregando viñetas o números para mejorar la legibilidad y comprensión del contenido.
Además, el uso de <b> nos permite añadir énfasis a ciertas palabras o frases, resaltándolas y haciéndolas destacar visualmente en el texto.
En resumen, la correcta utilización de estas etiquetas HTML nos facilita la tarea de comunicar eficazmente nuestras ideas, ofreciendo a los usuarios una experiencia de lectura más agradable y permitiendo un mejor entendimiento del contenido presentado.